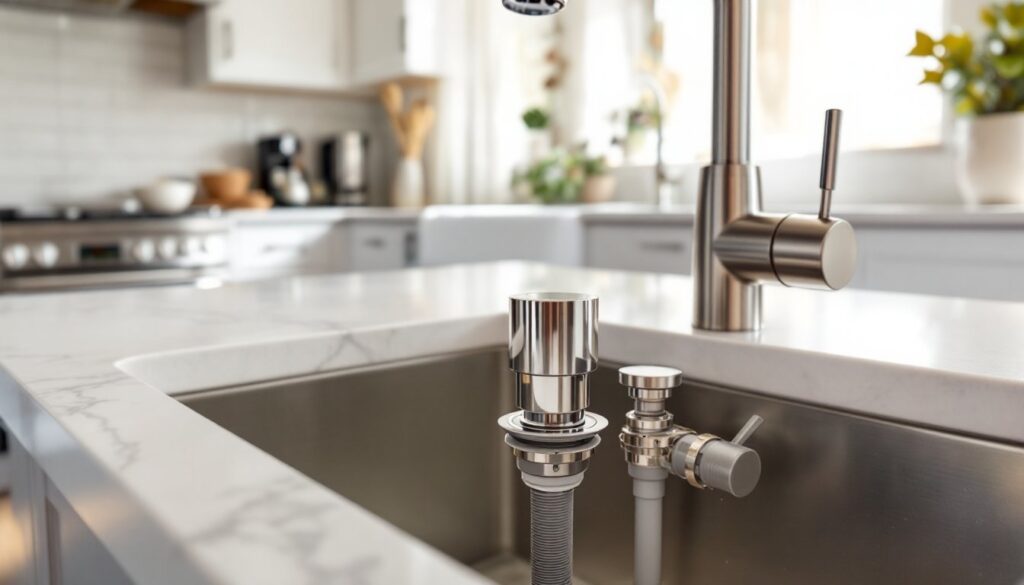
That odd little chrome cylinder poking up next to the kitchen faucet isn’t just decorative, it’s a dishwasher air gap, and it’s there to keep dirty drain water from siphoning back into clean dishes. If you’re installing a new dishwasher, remodeling a kitchen, or dealing with a local code inspection, understanding how this small device works can save headaches and ensure compliance. Some jurisdictions require them by law: others allow alternative methods. Either way, installation is straightforward if you know what you’re doing. Here’s everything a homeowner needs to know about dishwasher air gaps, from function to installation to troubleshooting common issues.
Table of Contents
ToggleKey Takeaways
- A dishwasher air gap is a backflow-prevention device that mounts on your sink deck and prevents dirty drain water from flowing back into clean dishes.
- Dishwasher air gap requirements vary by location—check your local plumbing code or building department, as some jurisdictions mandate them while others allow high-loop alternatives.
- Installing a dishwasher air gap takes about 30 minutes with basic tools and involves connecting inlet and outlet hoses to prevent siphoning through an open air chamber.
- Water overflowing from the air gap cap typically indicates a clog in the disposal or drain line; cleaning the outlet hose or running the disposal usually solves the issue.
- Regular maintenance, including cleaning dishwasher filters and checking for kinked hoses, keeps your air gap functioning reliably and helps avoid costly backflow contamination.
What Is a Dishwasher Air Gap?
A dishwasher air gap is a small, passive device that mounts on the countertop or sink deck and prevents wastewater from the kitchen drain from flowing backward into the dishwasher. It’s a simple backflow-prevention mechanism, essentially a vent with two hose connections underneath and an open air space in the middle.
Most dishwasher air gaps stand about 2 inches tall and have a polished chrome, brushed nickel, or white plastic cap that matches other kitchen fixtures. The visible portion is just a housing: the real work happens below the sink, where incoming water from the dishwasher drain hose enters one side, passes through an air break, then exits through a second hose that connects to the garbage disposal or drain tailpiece.
The term “air gap” refers to the physical separation between the two water streams. Unlike a check valve or dishwasher vent loop hidden under the counter, the air gap for dishwasher installations creates an actual gap exposed to atmospheric pressure. If backflow tries to occur, water spills out of the air gap cap into the sink rather than reversing into the dishwasher.
Some homeowners confuse the air gap with a dishwasher aerator (which doesn’t exist as a standard plumbing term) or a dishwasher air vent (which often means a high loop in the drain hose). The proper dishwasher air gap under sink setup uses dedicated fittings, typically ⅝-inch ribbed hose barbs on the underside of the device.
Why Dishwasher Air Gaps Are Required (And When They’re Not)
Whether you need an air gap depends on your local plumbing code. The Uniform Plumbing Code (UPC), adopted in many Western states, mandates air gaps for all residential dishwasher installations. The International Residential Code (IRC), common in much of the Midwest and South, allows either an air gap or a high loop, routing the drain hose as high as possible under the counter before it drops to the disposal or drain.
Check with your city or county building department before starting work. Some jurisdictions require air gaps even when the IRC technically allows alternatives. Inspectors look for them during final kitchen inspections, and missing one can delay a certificate of occupancy.
Air gaps serve a real health-and-safety purpose. If a clog forms in the main drain line and water backs up, the air gap prevents sewage from contaminating the dishwasher’s interior and the next load of dishes. This is especially important in homes with garbage disposals, where food debris can create temporary blockages.
A hidden dishwasher air gap alternative, mounting the device inside a cabinet or using an under-sink air gap fitting, is sometimes marketed, but most codes require the gap to discharge visibly into the sink basin or over a floor drain. The visibility is intentional: it alerts homeowners to drainage problems before they become serious.
If your area allows a high loop instead, it’s simpler cosmetically but offers less protection. The loop must reach within a few inches of the underside of the countertop, secured with a bracket or cable tie to the cabinet wall.
How a Dishwasher Air Gap Works to Prevent Backflow
Understanding how does a dishwasher air gap work makes troubleshooting easier. During a normal wash cycle, the dishwasher pump pushes used water through the drain hose, which connects to the inlet side of the air gap. Water flows up into the air gap body, passes across the open chamber (the actual “gap”), and exits down the outlet hose into the disposal or drain.
Because the chamber is open to air via small holes in the cap, atmospheric pressure prevents a vacuum or siphon from forming. If the drain line downstream clogs, water can’t reverse into the dishwasher, instead, it rises in the air gap and overflows out the cap, spilling into the sink. This visible overflow is a feature, not a bug: it warns the homeowner that the drain system needs attention.
The air gap doesn’t use any moving parts, check valves, or electrical components. It’s purely mechanical, relying on gravity and air pressure. That simplicity makes it reliable, but it also means debris can accumulate inside the narrow passages, especially if the dishwasher filter isn’t cleaned regularly or if food waste gets past the disposal.
Some dishwasher manufacturers include built-in backflow prevention, but it’s often a simple flapper valve that can stick or wear out. According to plumbing authorities on backflow, an external air gap provides a secondary, code-compliant layer of protection that doesn’t degrade over time.
Where to Install Your Dishwasher Air Gap
The most common location is on the countertop or sink deck, next to the faucet or soap dispenser. Most sinks come pre-drilled with an extra hole (usually 1¼ to 1⅜ inches in diameter) for this purpose. If no hole exists, you’ll need to drill one using a hole saw and plenty of water to cool the bit, especially on stainless steel or composite sinks.
When choosing where is the air gap on a dishwasher installation, keep it close to the dishwasher to minimize hose length, but position it so overflow spills into the sink basin, not onto the counter. The cap should sit above the sink’s flood rim, the highest point water can reach before overflowing.
Some homeowners prefer mounting the air gap at the back corner of the sink deck, away from the main work area, to keep it less conspicuous. Just make sure the outlet hose has a clear downward path to the disposal or drain, kinks or loops in this section can cause slow drainage or backups.
If your dishwasher is on an island or peninsula with no adjacent sink, you may need an alternative air gap configuration. Some codes allow the air gap to discharge over a floor sink or an open standpipe, but this requires inspector approval. Never hide the air gap completely inside a cabinet unless your jurisdiction explicitly allows an under-counter model designed for that purpose.
Avoid placing the air gap near cooktops or other heat sources. While the device is metal or plastic and won’t melt, excessive heat can degrade rubber hose connections over time.
Step-by-Step: How to Install a Dishwasher Air Gap
Installing an air gap takes about 30 minutes and requires basic hand tools. Always turn off the dishwasher’s circuit breaker and shut off the water supply before starting. Wear safety glasses when working under the sink, debris and old water often spill out when disconnecting hoses.
Materials and Tools Needed:
- Dishwasher air gap (chrome, brushed nickel, or white finish)
- ⅝-inch dishwasher drain hose (if not already in place)
- Hose clamps (usually ¾ to 1 inch, stainless steel)
- Adjustable wrench or slip-joint pliers
- Screwdriver (flathead or Phillips, depending on clamps)
- Teflon tape (optional, for threaded connections)
- Bucket and towels (for spills)
Installation Steps:
-
Prepare the mounting hole. If you’re using an existing hole, clean any debris or old putty. If drilling a new hole, mark the location on the sink deck, use a center punch to prevent the bit from wandering, and drill slowly with a 1¼-inch or 1⅜-inch hole saw. Apply a bead of plumber’s putty around the hole’s underside edge if the air gap doesn’t include a rubber gasket.
-
Insert the air gap from above. Drop the threaded shank through the hole. From underneath the sink, slide on the rubber gasket (if supplied), then the mounting nut. Hand-tighten the nut, then snug it with pliers, don’t over-torque or you’ll crack the sink deck.
-
Connect the inlet hose. The dishwasher’s drain hose (usually ⅝-inch ribbed) attaches to the inlet fitting on the air gap, typically the taller of the two barbs underneath. Slide a hose clamp over the hose end, push the hose firmly onto the barb, and tighten the clamp with a screwdriver.
-
Connect the outlet hose. Run a second ⅝-inch hose from the air gap’s outlet barb (the shorter one) to the dishwasher nipple on your garbage disposal or to a dishwasher tailpiece on the drain if you have no disposal. Secure both ends with hose clamps. The outlet hose should slope gently downward with no loops or kinks.
-
Test for leaks. Turn the water supply and circuit breaker back on. Run the dishwasher through a rinse cycle and watch the air gap and all connections for drips. If water overflows from the air gap cap, you likely have a clog downstream in the disposal or drain line.
For a detailed walkthrough with photos, experienced installers recommend marking hose lengths before cutting to avoid waste, and keeping spare clamps on hand, they’re easy to drop into the dark recesses under the sink.
Common Dishwasher Air Gap Problems and How to Fix Them
Water overflowing from the air gap cap is the most frequent complaint. It usually means a clog in the outlet hose or disposal. First, disconnect the outlet hose from the disposal and check for blockages, food debris, grease buildup, or even a forgotten disposal plug (a common rookie mistake on new installations). Flush the hose with hot water. If the disposal is clear, the main drain line may be partially blocked: run the disposal with hot water for 30 seconds to clear light clogs, or snake the drain if necessary.
Slow drainage without overflow often points to a kinked or sagging outlet hose. Check the hose path under the sink and straighten any bends. The hose should drop steadily from the air gap to the disposal without dips that can trap water.
Debris clogging the air gap itself happens when dishwasher filters aren’t cleaned regularly. Remove the cap (it usually twists or pulls off), then unscrew the top of the air gap body. Rinse the internal screen and passages under running water. Reassemble and test.
Leaks at hose connections typically result from loose clamps or split hoses. Replace any cracked or hardened hoses, they’re inexpensive and widely available at hardware stores. Use worm-gear hose clamps rather than spring clamps for a more secure grip.
Air gap doesn’t match the sink finish. If the chrome air gap clashes with a matte black faucet, replacement caps are sold separately in various finishes. Just unscrew the old cap and swap it, no plumbing work required.
If you’re dealing with persistent drainage issues even though a clean air gap, the problem may lie in the dishwasher’s pump or impeller, or in the main house drain. That’s when it’s time to call a plumber. For homeowners tackling broader kitchen remodels, resources from advanced building sites often cover integrated drain system design and venting strategies that go beyond single-appliance fixes.
Conclusion
A dishwasher air gap is a small, often overlooked component that plays an outsized role in kitchen safety and code compliance. Installing one is straightforward, requires no special skills, and can prevent costly backflow contamination. Whether it’s mandated by local code or simply good practice, taking the time to install and maintain an air gap properly ensures the dishwasher drains reliably and protects the household water supply.