A bathroom vanity mirror isn’t just a place to check your reflection, it’s a functional centerpiece that affects lighting, perceived space, and the overall usability of the room. Get it wrong, and you’ll struggle with shadows, cramped sightlines, or a mirror that feels awkwardly proportioned. Get it right, and the vanity area becomes one of the most polished, practical zones in the house. Whether you’re replacing a builder-grade plate mirror or upgrading a dated medicine cabinet, understanding sizing, mounting methods, and lighting integration will save time, prevent costly mistakes, and deliver results that look professionally installed.
Table of Contents
ToggleKey Takeaways
- A bathroom vanity mirror affects lighting, perceived space, and room functionality—poor sizing or placement leads to shadows, cramped sightlines, and imbalanced proportions.
- The mirror width should be 2–4 inches narrower on each side than the vanity top, with height ranging from 30–40 inches and 4–6 inches clearance from the backsplash to prevent water splatter.
- Secure heavy bathroom vanity mirrors (over 20 pounds) using mechanical fasteners like toggle bolts or studs as primary support, with optional construction adhesive as backup for added safety.
- Install wall sconces 36–40 inches apart and 60–66 inches from the floor for even, shadow-free lighting; choose warm white (3000K–3500K) bulbs with a CRI of 90+ for accurate color rendering.
- Frameless mirrors deliver a clean, modern look and are lighter to install, while framed mirrors add architectural interest and hide wall imperfections but require sealed or moisture-resistant finishes in bathrooms.
- Regular maintenance—using vinegar-water solution on a microfiber cloth, wiping frames dry, and checking mounting hardware every six months—keeps your bathroom vanity mirror looking polished and functional for years.
Why Your Bathroom Vanity Mirror Matters More Than You Think
A vanity mirror in bathroom spaces dictates how effectively the room functions during daily routines. Poor mirror placement or undersized dimensions create blind spots when applying makeup, shaving, or styling hair. Oversized mirrors, on the other hand, can overwhelm small powder rooms and make the space feel unbalanced.
Beyond functionality, the mirror influences perceived room size. A large bathroom vanity mirror reflects light and visually doubles the square footage, making even a cramped half-bath feel more open. Frameless options deliver a modern, seamless look, while framed mirrors add architectural interest and can tie together finishes like faucets, hardware, and lighting fixtures.
From a practical standpoint, the mirror also affects lighting performance. A mirror positioned too far from sconces or overhead fixtures will cast shadows on the face, making grooming tasks harder. Properly sized vanity mirrors for bathroom spaces should align with both the sink width and the light sources to ensure even illumination without glare.
Ignoring these factors leads to frustration and often triggers a second round of purchases. Measure carefully, consider the room’s layout, and think about how the mirror interacts with everything around it before making a final decision.
Types of Bathroom Vanity Mirrors to Consider
Choosing the right style of bathroom mirrors vanity involves understanding the trade-offs between aesthetics, durability, and installation complexity. Here are the most common types:
Medicine Cabinets with Mirrors: These combine storage and reflection in one unit. Recessed models require cutting into the wall between studs, which works well in new construction or gut renovations but can be tricky in retrofit situations if plumbing or electrical lines are present. Surface-mount cabinets are easier to install but protrude several inches from the wall.
Pivot Mirrors: These tilt on horizontal hardware, allowing users to adjust the angle. They’re particularly useful in households with height differences but require solid blocking or wall anchors rated for the mirror’s weight plus the leverage created by tilting.
LED-Integrated Mirrors: Built-in LED strips around the perimeter provide even, shadow-free lighting. Installation requires hardwiring into a junction box, so budget for an electrician if you’re not comfortable working with 120V circuits. Some models include defoggers and dimmer switches.
Standard Hung Mirrors: The simplest option. These mount directly to the wall with D-rings, Z-bars, or adhesive clips. They offer the most flexibility in size and frame style but require separate lighting fixtures.
Framed vs. Frameless Mirrors
Framed mirrors add a finished, decorative element and can hide rough drywall edges or imperfect cuts from previous installations. Wood, metal, and composite frames are available: wood frames in bathrooms should be sealed or primed to resist moisture. Metal frames (aluminum, brushed nickel, oil-rubbed bronze) hold up better in high-humidity environments but can show water spots if not wiped down regularly.
Frameless mirrors (also called plate or beveled mirrors) deliver a clean, minimalist look and are typically lighter, making installation simpler. They’re mounted using mirror clips, J-channels, or construction adhesive (often a combo of both for redundancy). The downside: edges must be polished or beveled, and any wall imperfections become visible. Frameless designs work best in modern, contemporary, or Scandinavian-style bathrooms where simplicity is the goal.
How to Choose the Right Size and Shape for Your Vanity
Sizing a vanity mirror bathroom fixture correctly prevents the “floating” or “swallowed” look that happens when proportions are off. Follow these guidelines:
Width: The mirror should be narrower than the vanity top, generally 2 to 4 inches less on each side. For a 36-inch vanity, aim for a mirror between 28 and 32 inches wide. If you have a double vanity (60 inches or wider), decide whether to use one large mirror spanning most of the width or two separate mirrors, each centered over a sink.
Height: Standard vanity mirrors range from 30 to 40 inches tall. Taller mirrors (up to 48 inches) work well in bathrooms with high ceilings or when the vanity is shorter than 32 inches, ensuring adequate reflection for taller users. Leave at least 4 to 6 inches of clearance between the top of the mirror and the ceiling or any crown molding.
Clearance from Faucet and Backsplash: Position the bottom of the mirror 4 to 6 inches above the backsplash or countertop if there’s no backsplash. This prevents water splatter from hitting the mirror and allows space for countertop accessories without blocking the reflection.
Shape Considerations: Rectangular mirrors are the most versatile and fit most vanity widths. Round and oval mirrors soften angular bathroom designs and pair well with vessel sinks or pedestal sinks. Arched mirrors add a transitional or traditional touch but require more wall height. Irregularly shaped mirrors (hexagonal, asymmetrical) work best as accent pieces in powder rooms, not primary vanities.
Template Before You Buy: Cut a piece of cardboard or painter’s paper to the mirror’s dimensions and tape it to the wall. Live with it for a day or two, checking sightlines and proportions at different times of day. This step catches sizing mistakes before you drill any holes.
Installation Tips: Hanging Your Vanity Mirror Like a Pro
Installing bathroom vanity mirrors safely and level requires the right hardware, accurate measurements, and respect for wall type and mirror weight. Here’s the process:
Tools and Materials:
- Stud finder (magnetic or electronic)
- Level (24-inch or laser level)
- Drill/driver with appropriate bits (masonry bit for tile, wood bit for studs)
- Wall anchors (toggle bolts for drywall, plastic anchors for studs, or Molly bolts)
- Painter’s tape (to mark placement and protect the wall)
- Mirror clips or D-ring hangers (depending on mirror type)
- Construction adhesive (optional, for added security on frameless mirrors)
- Safety gear: gloves and eye protection
Step-by-Step Installation:
-
Locate Studs: Use a stud finder to mark stud locations with painter’s tape. Studs are typically spaced 16 inches on center in modern construction, but older homes may use 24-inch spacing. Anchoring into studs provides the strongest hold.
-
Mark the Height: Measure up from the countertop or backsplash to your desired mirror height (usually 4 to 6 inches clearance). Use a level to draw a light pencil line where the bottom edge of the mirror will sit.
-
Mark Hanger Positions: If using D-rings or a hanging wire, measure from the top of the mirror to the hanger point and transfer that measurement to the wall. For mirrors over 30 pounds, use two mounting points spaced as wide as possible for stability.
-
Drill Pilot Holes: Drill into studs when possible. If studs aren’t aligned with your hanger locations, use toggle bolts rated for at least 50 pounds each for drywall, or appropriate anchors for tile or plaster walls. Tile requires a carbide or diamond-grit bit: use low speed and light pressure to avoid cracking.
-
Install Hanging Hardware: Screw in wall anchors or brackets, leaving a small gap (about 1/8 inch) for the mirror’s hanger to slide in. Double-check level before tightening fully.
-
Hang and Adjust: Lift the mirror onto the hangers (a second person helps with mirrors over 40 pounds). Check level and make micro-adjustments by loosening one side slightly.
-
Optional Adhesive Backup: For added security, especially in earthquake-prone regions or homes with children, apply a bead of construction adhesive (like Liquid Nails for Mirrors) along the back perimeter. Press firmly and support with painter’s tape until cured (usually 24-48 hours). This also reduces rattling.
Safety Note: Never hang heavy mirrors (over 20 pounds) using adhesive alone. Always use mechanical fasteners as the primary support. If installing over tile, be aware that drilling can void tile warranties in some cases, consult professional advice if unsure.
Lighting Considerations for Optimal Mirror Performance
A bathroom vanity mirror only performs as well as the lighting around it. Poor lighting creates shadows under the eyes, chin, and cheekbones, making grooming tasks frustrating.
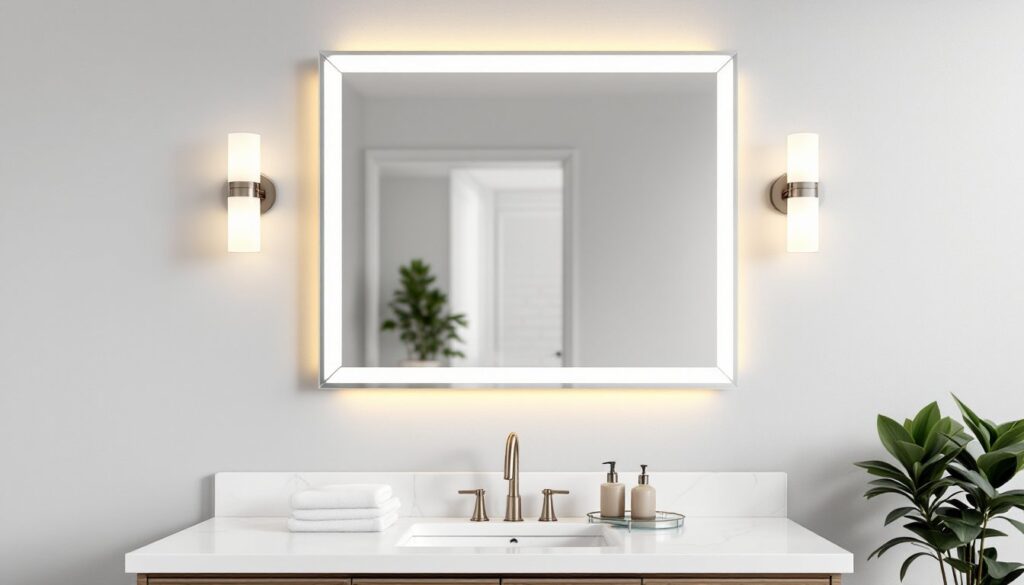
Sconce Placement: Wall sconces should be mounted 36 to 40 inches apart (measured center to center) and at 60 to 66 inches from the floor to the center of the fixture. This positions lights at face level, minimizing shadows. Sconces flanking the mirror deliver more even illumination than a single overhead fixture, which casts shadows downward.
Overhead Lighting: If sconces aren’t an option, use a multi-bulb vanity bar mounted directly above the mirror, ideally 75 to 80 inches from the floor. Choose fixtures with frosted or opal glass shades to diffuse light and prevent harsh glare on the mirror surface.
Color Temperature: For makeup application and shaving, 3000K to 3500K (warm white to neutral white) bulbs provide accurate color rendering without the clinical harshness of daylight bulbs (5000K+). LED bulbs with a CRI (Color Rendering Index) of 90 or higher show skin tones and colors most accurately.
Dimmer Switches: Install dimmers to adjust brightness based on time of day. Bright task lighting works for morning routines: softer lighting is better for evening relaxation. Most LED-compatible dimmers require specific bulbs, verify compatibility to avoid flickering.
Mirror-Integrated Lighting: LED mirrors with built-in lighting simplify installation but require hardwiring. Some models include motion sensors or touch controls. If going this route, hire a licensed electrician unless you’re comfortable working with electrical codes (NEC Article 410 covers bathroom lighting requirements, including GFCI protection for outlets near water sources).
Natural Light: If the vanity is near a window, consider how daylight interacts with artificial light. Frosted or textured window film diffuses harsh morning sun without blocking light entirely.
Styling and Maintenance Tips to Keep Your Mirror Looking Great
Once installed, a few styling tweaks and regular maintenance keep the mirror looking sharp and extend its lifespan.
Cleaning Without Streaks: Use a 50/50 mix of distilled white vinegar and water or a dedicated glass cleaner. Spray onto a microfiber cloth, not directly on the mirror, to prevent liquid from seeping behind the glass and damaging the backing. Wipe in a Z-pattern, then buff with a dry cloth. Avoid abrasive cleaners or scrub pads, which can scratch the surface or damage frame finishes.
Defog Quickly: After showers, wipe the mirror with a dry towel or turn on the bathroom exhaust fan to reduce humidity. Some mirrors with integrated shelves include built-in defoggers, a heating element behind the glass that prevents condensation.
Frame Care: Dust wood frames with a dry cloth: use furniture polish sparingly and only on sealed finishes. For metal frames, wipe with a damp cloth and dry immediately to prevent water spots. Touch up scratches on painted frames with a matching paint pen.
Layering Accessories: Keep countertops minimal to let the mirror shine. A single tray corrals daily-use items (toothbrush holder, soap dispenser) without visual clutter. If the mirror is large, balance it with symmetrical sconces or matching hand towels on either side.
Updating Hardware: Swapping out dated faucets, cabinet pulls, or light fixtures can make an older mirror feel refreshed without the cost of replacement. Match finishes (brushed nickel, matte black, polished chrome) across all fixtures for a cohesive look.
Inspecting Mounts: Every six months, check that mounting hardware remains tight, especially in homes with settling foundations or in humid climates where wood framing can expand and contract. Retighten screws as needed.
For more design inspiration on integrating mirrors into broader bathroom renovations, explore portfolios that show how different mirror styles pair with tile, cabinetry, and lighting choices. A well-chosen vanity mirror bathroom fixture ties the room together and handles daily use for years without losing function or style.