Walk in shower kits have transformed bathroom renovations from multi-week contractor marathons into manageable weekend projects. These prefabricated systems bundle walls, pans, doors, and hardware into one coordinated package, cutting both cost and chaos. Whether replacing a worn-out tub-shower combo or upgrading a cramped stall, homeowners can now tackle installations that once demanded plumbers, tile setters, and a small fortune. The catch? Understanding what you’re buying, how the pieces fit together, and where amateur enthusiasm should yield to professional help. This guide walks through every decision point, from kit types and must-have features to installation steps and the mistakes that turn simple upgrades into expensive do-overs.
Table of Contents
ToggleKey Takeaways
- Walk in shower kits cut installation costs from $3,000–$8,000 for custom tile to $800–$2,500, with experienced DIYers completing installation in just 16–24 hours over a weekend.
- Walk in shower kit components—including reinforced acrylic pans, interlocking wall panels, and pre-assembled doors—eliminate common waterproofing mistakes that plague grout-based installations.
- Inspect your subfloor, dry-fit the pan to verify drain alignment, and use 100% silicone sealant (not latex) to avoid the most costly installation errors that lead to leaks and water damage.
- Standard walk in shower kit sizes fit common alcoves (36×48 inches, 60×36 inches) or corners, though custom dimensions and barrier-free options exist for specialized needs.
- Skip rushing the cure time—allow adhesive and silicone 24–48 hours before water exposure to ensure watertight seams and prevent costly water intrusion and mold issues.
- While walk in shower kits sacrifice design flexibility compared to custom tile, they offer superior durability, minimal maintenance, and accessibility upgrades for aging-in-place renovations.
What Are Walk In Shower Kits?
A walk in shower kit is a factory-assembled package containing all major components needed to build a shower enclosure. Most kits include a shower pan (the floor base), wall panels (typically three or five pieces), a drain assembly, and mounting hardware. Higher-end kits add walk in shower kits with doors, either hinged, sliding, or frameless glass panels, plus shelving, grab bars, and trim pieces.
The term “walk-in” refers to the low-threshold or no-threshold entry, eliminating the step-over barrier of traditional tubs. Some kits are walk in shower inserts designed to retrofit existing alcoves (the three-walled recesses where bathtubs sit). Others function as walk in shower stalls, freestanding units with their own back and side walls, ideal for basements or converted closets.
Materials vary. Acrylic and fiberglass dominate budget-friendly kits: they’re lightweight, crack-resistant, and easy to clean. Cultured marble and solid-surface composites appear in mid-tier options, offering stone-look aesthetics without grout lines. Tile-ready kits provide waterproof backer panels that accept ceramic or porcelain tile for a fully custom appearance.
Dimensions follow standard rough opening sizes: 32×32 inches (corner neo-angle units), 36×48 inches (small alcoves), and 60×36 inches (tub-replacement alcoves). Custom sizes exist but cost more and ship slower.
Why Choose a Walk In Shower Kit Over Custom Installation?
Cost tops the list. A custom tile shower runs $3,000–$8,000 in labor and materials for a basic 60-inch alcove. A comparable walk-in shower kit costs $800–$2,500, and a motivated DIYer can install it in two weekends. Even hiring a handyman to handle plumbing hookups keeps total outlay well below custom pricing.
Speed matters when you’re down to one working bathroom. Tile jobs demand multiple trades, plumber, tile setter, grouter, and cure times stretch across ten days. Prefab kits go in faster. Experienced DIYers finish walk in shower replacement projects in 16–24 hours of actual work, spread over a weekend or two evenings.
Waterproofing consistency is baked in. Factory-molded pans have integral curbs and sloped floors: seams between wall panels use interlocking flanges and silicone, not mortar beds and RedGard membranes. Beginners often botch tile waterproofing, missed corners, thin membrane coats, improper pan liners, leading to rot and mold. Kits eliminate most of those failure points.
Maintenance simplicity seals the deal for many homeowners. Grout requires annual resealing and eventually cracks or stains. Acrylic and composite panels wipe clean with spray cleaner: no scrubbing grout lines or battling mildew in porous tile.
The trade-off? Design flexibility. Tile showers accommodate any size, shape, or color scheme. Kits lock you into manufacturer dimensions and finish palettes. If you’re chasing a specific aesthetic, Moroccan zellige, terrazzo slabs, herringbone marble, tile remains the only path.
Types of Walk In Shower Kits Available
Alcove kits fit three-sided recesses where bathtubs once lived. They include a back wall panel and two side panels, relying on existing framing for support. Standard tub-replacement alcoves measure 60×32 inches: smaller alcoves run 48×36 inches or 36×36 inches. Alcove kits are the most common walk in shower inserts for whole-home remodels.
Corner and neo-angle kits tuck into room corners, using two existing walls. Neo-angle models have an angled front with a pie-slice footprint (typically 38×38 inches), saving floor space in tight bathrooms. Corner square or rectangular kits range from 32×32 inches to 42×36 inches. Both styles usually ship with matching walk in shower enclosures, frameless or semi-frameless glass doors.
Freestanding stalls (also called walk in shower units) include all four walls and a pan. They’re self-supporting, ideal for basement bathrooms, garage conversions, or open floor plans where no alcove exists. Sizes start at 36×36 inches and reach 48×48 inches. Some freestanding units arrive as single-piece fiberglass shells: others assemble from interlocking panels.
Barrier-free and roll-in kits eliminate thresholds entirely, meeting ADA accessibility standards. The shower pan slopes gently to a linear drain, and there’s no curb to step over. These kits often include reinforced walls for grab bars and fold-down benches. They’re pricier, expect $1,800–$4,000, but essential for aging-in-place renovations or wheelchair access.
Tile-ready kits provide waterproof foam or cement-board wall panels and a presloped mortar pan, but no finished surface. Homeowners or tile setters apply ceramic, porcelain, or natural stone over the substrate. This hybrid approach cuts waterproofing labor while preserving design freedom.
Key Features to Look for When Buying a Shower Kit
Pan construction makes or breaks durability. Reinforced acrylic pans (fiberglass-backed) flex slightly underfoot but won’t crack if the subfloor settles. Thin acrylic pans (less than ¼ inch) feel flimsy and can spider-crack around the drain. Cultured marble and solid-surface pans are rigid and scratch-resistant but heavy, confirm your floor joists can carry the load (typically not an issue for ground-floor installs).
Check drain compatibility. Most kits use center drains: some offer offset or linear drains. If you’re retrofitting an alcove, measure your existing drain location before ordering. Relocating a drain requires breaking concrete or rerouting plumbing through joists, jobs best left to licensed plumbers.
Wall panel thickness and seam design affect longevity. Panels thicker than ¼ inch resist bowing when you lean against them. Interlocking seams with built-in gasket channels shed water better than simple butt joints sealed with caulk. Renovating older homes often reveals out-of-plumb walls: look for kits with adjustable panel edges or trim strips that hide gaps.
Door configuration matters for tight spaces. Sliding doors need no swing clearance but leave half the opening blocked. Hinged doors (pivot or side-mount) provide full-width access but require 24–30 inches of clearance outside the shower. Frameless glass looks sleek but costs $400–$800 more than framed doors. If your kit doesn’t include a door, measure the rough opening height and width, most aftermarket walk in shower enclosures fit standard 60- or 72-inch openings.
Accessories vary by kit. Built-in shelves, corner seats, and towel bars add convenience. Reinforced backing for grab bars is critical if anyone in the household has mobility concerns: retrofitting grab bars into hollow fiberglass panels later requires through-bolting into studs, which can crack thin walls. Some manufacturers offer slip-resistant pan textures and antimicrobial coatings, worth considering for safety and low-maintenance cleaning.
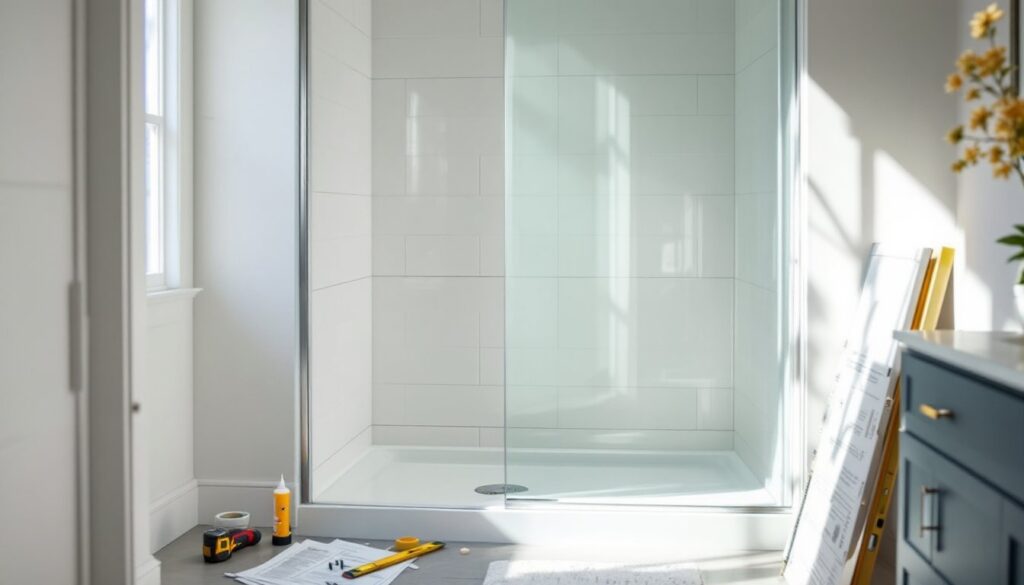
Step-by-Step: Installing Your Walk In Shower Kit
1. Obtain permits and inspect framing. Most jurisdictions require plumbing permits for shower replacements. The inspector will verify that drain lines slope correctly (¼ inch per foot minimum) and that supply lines meet code. If you’re converting a tub alcove, confirm the subfloor is solid, no soft spots or rot. Replace any damaged joists or plywood before proceeding.
2. Rough in plumbing. Position the shower valve at 38–48 inches above the finished pan height (adjust for tall or short household members). Install the valve centered in the alcove unless the kit instructions specify otherwise. Stub out the showerhead line at 76–80 inches for standard heads: add a second outlet at 48 inches if installing a handheld sprayer. Use PEX or copper: avoid flexible CPVC in shower walls (it creeps over time). Many DIYers hire a plumber for this stage, expect $300–$600 for valve installation and pressure testing.
3. Install the shower pan. Spread a mortar bed (Type S or thin-set) over the subfloor to fill voids and support the pan uniformly. Some manufacturers specify setting the pan in silicone instead. Level the pan front-to-back and side-to-side, shimming as needed. Attach the drain tailpiece to the P-trap, tightening the compression nut until snug, don’t overtighten or you’ll crack the pan threads. Let mortar cure 24 hours before proceeding.
4. Attach wall panels. Most kits use construction adhesive (PL Premium or equivalent) and mechanical fasteners. Apply adhesive beads 6 inches on center to studs or backer board. Press panels into place, checking plumb with a 4-foot level. Fasten through predrilled holes into studs using stainless screws or the provided clips. Start with the back wall, then sides. Overlap flanges per the instructions, usually the back panel laps over the sides. Seal all seams with 100% silicone caulk (clear or color-matched): avoid latex-silicone blends, which shrink and allow water intrusion.
5. Install trim, door, and fixtures. Snap trim strips over panel edges if included. Mount the shower door according to the manufacturer’s template, this step demands patience and a helper. Most frameless doors adjust ±¼ inch: out-of-plumb walls beyond that range require shimming or scribe-fitting. Attach the showerhead, valve handle, and any accessories. Apply a final bead of silicone where the pan meets the walls.
6. Test and cure. Run water for 15 minutes, inspecting every seam for leaks. Check the P-trap connections in the crawlspace or basement below. Let silicone cure 24–48 hours before using the shower. Tackling bathroom plumbing projects often uncovers surprises: budget extra time for troubleshooting.
Common Mistakes to Avoid During Installation
Skipping subfloor inspection leads to sagging pans and cracked drains. If the floor feels spongy, sister new joists alongside old ones or add blocking between joists. A shower pan loaded with water and a person weighs 400–600 pounds concentrated in a few square feet.
Misaligning the drain is the costliest error. Dry-fit the pan before gluing anything. Confirm the drain hole centers over the P-trap. If you’re off by more than ½ inch, you’ll need an offset flange or a plumber to relocate the trap.
Over-tightening fasteners cracks acrylic and fiberglass. Use a drill with an adjustable clutch set to low torque. Screws should snug the panel to the stud without dimpling the surface. Some pros recommend drilling ⅛-inch pilot holes in panels even if not specified, cheap insurance against splits.
Using the wrong sealant guarantees leaks. Latex caulk and adhesive caulk shrink: polyurethane caulk turns yellow and hardens into an unmovable mess. 100% silicone stays flexible, adheres to acrylic and fiberglass, and resists mildew. Apply it generously, don’t skim on seams.
Ignoring level and plumb creates problems downstream. A pan that slopes toward the room instead of the drain will pool water. Wall panels off-plumb by more than ¼ inch over 8 feet won’t seal properly against the door frame. Check level and plumb at every step.
Forgetting expansion gaps causes panels to buckle. Most kits require a ⅛-inch gap where panels meet the ceiling or adjacent walls. Silicone fills the gap and allows seasonal movement. Jamming panels tight leads to stress cracks after a few freeze-thaw cycles or humidity swings.
Rushing the cure time on adhesive or silicone invites failure. Even “fast-curing” products need 24 hours before water exposure. Pressuring a seam before the silicone skins over washes away uncured material, leaving pinholes for leaks.
Conclusion
Walk in shower kits strip away the complexity and cost that once made shower upgrades a contractor-only job. By bundling components and standardizing dimensions, manufacturers have handed DIYers a legitimate path to professional-looking results, assuming careful planning, honest assessment of skill level, and respect for the details that separate watertight from “wait, why is the ceiling dripping?” If roughing in plumbing or framing new walls feels beyond your comfort zone, hire those pieces out and tackle the assembly yourself. The kit does the heavy lifting: your job is precision and patience.